Tuesday, January 31, 2012

The Wingback Chair Transformation


My problem is I just can't say no. My friend Tara was buying a piece of furniture off of Craigslist and the seller just so happened not want this chair and pretty much unloaded it on her. Tara didn't want the old nasty thing (I don't blame her), so it would just be left out in the trash. Enter Ashley the free-furniture hoarder to the rescue! Fast-forward six months later and I'm finally getting around to reupholstering it. This wasn't my first reupholstering project, I did this and this a few years back. This wingback chair is on a whole new level.

I first shopped around for some inspiration:

Apartment Therapy, here and Crate and Barrel, here

I love the bright colors and bold patterns. Everything in our apartment is brown or muted patterns, so I want to be able to throw something a little crazy in the mix and still have it match. That's not asking too much right?

Martha Stewart, here and Design Sponge, here

I made Mike go fabric shopping with me until we finally agreed on an orange and brown floral pattern. We found it for $6 a yard at Hancock's and since it was so cheap I bought new matching material to re-do the old chair (it's in storage, so that's not a pressing issue). I found this great yardage guide on Apartment Therapy and figured I'd need about six yards for my project. Time to get to work.


I've learned in the past, you should try to keep the original fabric in tact, this way you can use it as a pattern. It also helps to keep notes as to how many staples you pulled out, where buttons were located, etc. Unfortunately, this was not an option for me. When I started taking apart the chair, the fabric was ripping in every direction. Plus, the amount of dust and grime rising from the chair convinced I didn't want that old fabric touching the new.


I pulled out about 180 upholstery tacks and maybe a thousand nails and staples (take a part the chair took more than six hours!). Mike's stepmom advised me to skip the tufting (the buttons) on the front of the chair to save time and agony - GREAT idea! Instead, I filled the divots with a little fabric tack and fiber fill. I added some new padding where necessary. I fiddled with the fabric until finally understanding how to put it back together. And found an unused pillow to repurpose for the new chair.

Hard at work - you can almost see all my band-aids on my hands!
 

So, here's the breakdown: I spent $36 on fabric, $10 on batting, $6 on upholstery nails, $2 on staples for the staple gun. A total of $54, three blisters, a lung full of dust and about 20 hours of work (would have been a lot more if it hadn't been for Mike). I'd say not bad for my first attempt.

What did I learn? What would I do differently next time? First, I'd wear a mask and rubber gloves (went to bed unable to breathe after the first day of ripping apart the chair). You can never have enough padding, so buy plenty of extra. That goes with the nails and staples as well. I'm glad I finished the project, as there were many times I had looked up the upholstery man phone number....However, I don't think I'll be tackling another project like this one in quite some time!


Monday, January 30, 2012

Music Mondays

Thanks to the Library of Congress.

It was a crazy awesome weekend and now I need a little time to relax. I mixed together a little 'calm yourself music.' And you have to love the "Alda Relaxing at Home" photo (yes, that's really what it's called) from the Library of Congress.

Friday, January 27, 2012

New Jewelry Packaging


I mentioned in my craft show (self) critique, I thought the packaging for my button earrings and hair clips fell a little short. While I really liked the idea of using the old vintage flash cards as the display card, it was just a little too busy – and the shop name was too hard to read.


I finally had a little free time this week and got to work on the designs. It's super simple, but clean and cute. I went with the brown card so the earrings would really stand out. The color also ties in with the brown paper wrapping all my items are shipped in, and the shopping bag at the craft show.

Now, I have to get through editing all the new photos of the earrings and you'll be able to purchase any – or all – of them at the shop!

Thursday, January 26, 2012

Re-purposing Grandma's Shorts

I need to start this post with a little story.


Growing up my grandparents were always known as the "Bickersons." They would quarrel over a Monopoly game (for 35 minutes), how much toilet paper to buy, not to hang pictures on the walls, realy, just about anything. I remember in the Summer my grandma would wear these blue shorts covered in elephants, peacocks, tribal men with spears and crazy little geometric shapes. Anyway, one day they were squabbling about something and my grandpa says "Well at least I don't have a damn elephant on my ass!" Ever since that day, I cherished that memory – and those shorts. I was telling my mom and sister this story when we were cleaning out my grandma's house last Spring and they were cracking up. You could imagine my delight when at the bottom of a box, under several sweaters I found my cherished memories – the shorts! I shrieked with happiness and ran to put them in 'my pile' to take home.

Finally about eight months later I'm getting around to making something from them (did you think I was actually going to wear them? My grandpa would turn over in his grave!). I transformed the shorts into little cosmetic/travel bags for my mom and sister for their birthdays.

So the moral of the story? Re-purpose your favorite childhood fabrics into more useful adulthood items!

DIY: Paper Garland


It was my sister's birthday was two weeks ago and since I couldn't throw her a little party (or buy her an iced coffee at a Mr. Yims in Bangkok like I did last year for her special day), I included some handmade paper garland in her package. Makes up for it, right?

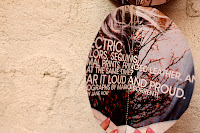
Anyway, this super easy DIY project took about 10 minutes and would add a little flair to any mantle or door frame. All you need is a magazine (I used "W"), scissors, a CD and a sewing machine. Simple trace the CD in several pages of the magazine. Cut out the circles. Place two together and sew straight down the middle. Repeat until you've used all your circles, hang up and separate the circles to give the garland a 3-D effect. You can cater your garland to any taste just by changing up the magazine - or kind of paper.

Wednesday, January 25, 2012

Ham Biscuits & Potatoes


My friend Melissa made these delicious ham biscuits for her holiday party last month and people were raving about the little rolls all night! Unfortunately, I didn't get to eat any so I decided to make some of my own (and the regular kind for Mike), vegetarian style. The great thing about this recipe is you can cater it to just about any taste. Don't like ham? Substitute roast beef or chicken. You could also add all sorts of vegetarian meats to spice things up for the non-meat eaters. For a side I threw together my mom's oven roasted potatoes and dinner is served!

Biscuits
What you need:
King's Hawaiian Sweet Rolls
Ham (deli slices or fancy it up with an actual loaf)
Swiss Cheese, Cream Cheese, American Cheese
3/4 stick of butter
1 tbsp dijon mustard, Worchester sauce
1 tsp minced onion

What you do:
1. Cut the rolls in half, keeping all the tops together and all the bottoms together.
2. For the meat biscuits, layer ham and cheese, with a dab of cream cheese on the very top. Do the same for the veg biscuits, leaving off the meat. Cover with the top half of the rolls
3. Melt the butter and mix in the condiments. Coat the tops of the biscuits and refrigerate 15 minutes.
4. Bake at 350 degrees for 15 to 20 minutes or until bread is golden brown and cheese is gooey.


Oven Roasted Potatoes
What you need:
5-6 medium red-skin potatoes
1/2 package of (dry) French onion soup mix
1/4 cup oil
Rosemary, salt, pepper

What you do:
1. Scrub the potatoes and chop into cubes. If you want to speed the process up, you can microwave for 10-15 minutes with about a 1/2 cup of water. Drain the water and proceed to next step.
2. Mix soup package, oil and seasonings and coat the potatoes. Bake in the oven at 400 degrees for 30 minutes or until tender.

Our First Giveaway


I know I shared with you last week I started sponsoring Pink Lemonade, which is very exciting for me. However, today until the 31st you could win a pair of Fairview Place original earrings, along with lots of other goodies, over at Pink Lemonade. Hop on over to the blog for your chance to win!

Tuesday, January 24, 2012

Car Must Haves

I try to go shopping for new things for the store about once a week, most of the time it happens on Mondays. You never know what you're going to find out there waiting for you, which is the thrill of it all for me. However, in the last six months I've learned there are some things I can't do without in my car. 

1. Bungee Cords
Everyone underestimates what I can get into my little VW Rabbit! I've actually hauled a five-foot buffet table (with a little room to spare), a large old-fashioned wing back chair and bikes in that trusty car. Occasionally, it's a little tight and it's nice to have my bungee cords when the hatchback can't quite make it all the way closed. They also remind me of my Grandpa for some reason, maybe those old school colors, but I like them :)


2. A Rug
This is to protect your car and your purchases! A rug gives a little more padding than a sheet so if you're new love seat has a spring sticking out of the bottom, you won't snag your car interior. You can also add some trendy colors to that boring car felt that plagues the trunk, ha.


3. A Flat Sheet
This is along the same lines of the rug, but with the bigger surface you can wrap up that old baker's rack so your car won't get covered in dirt and rust. It folds up small so it won't take up space. Plus, you never know when you might end up at the beach without a towel and need something to sunbathe on :)


4. Measuring Tape
This is pretty obvious, you need to make sure you'll actually be able to get that vintage desk home once you've bought it. Oh, and my measuring tape is a Cleveland Browns football helmet (thanks, Dad), you can choose whichever NFL team you desire...


5. Cardboard Box
I almost always avoid the plastic bags, but when you're out shopping all day you might end up with a used goods explosion in your backseat if you're not careful. I like to keep some kind of box or even a plastic crate in the back to throw my purchases in throughout the day. It keeps the car tidy and protects your bargains in the long run.

One thing not shown is what I like to call the "backseat snack." Sometimes you're gone a lot longer than you originally planned and it's always nice to have that emergency bag of Goldfish hanging out back there :)

Monday, January 23, 2012

Music Monday


It's officially the start of my birthday week! Since we're celebrating my day with an 80s party and Legwarmer's concert I thought this week's Music Monday should be none other than an 80s-tastic mix. Also, a little blast from the past with a photo of me around the age of 1 1/2. Happy Monday!

Sunday, January 22, 2012

Don't Forget!


This week is restaurant week in Downtown Norfolk! Since this is also the kickoff to my birthday week (turning 27 in T minus six days), I think I'll do a lunch and a dinner. Or maybe two lunches... decisions, decisions! You can see all the participating restaurants here, and don't forget I'm always up for lunch :)

Friday, January 20, 2012

First Sponsorship

Pink Lemonade - the blog

I've been following Pink Lemonade for a little while now. It's a a totally fun blog featuring everything from DIYs to daily inspirations, designer/crafter features to giveaways. Plus, with 50,000 page views per month, this 15-year-old blogger is rockin' and rollin'!

The first advertisement :)

I contacted Paige about a three-month sponsorship and within 30 minutes she had my AD up and running. I'd highly suggest checking out her shop, but a fair warning, it'll be hard not to buy something :)

New at the Shop

Rhinestone tear drop necklace, Beaded twist necklace,
Triple rhinestone pendant necklace

I'm so happy to finally show off my small, but growing, collection of vintage and retro jewelry at Fairview Place. This collection has been accumulating for quite some time, so I've picked the cream of the crop for the first release. You never know what I'll have in store next!


Thursday, January 19, 2012

Thrifty Thursdays


I found this pack of bird flash cards for only $1 at the thrift store right down the street. I have three options of what I can do with them:

1. Make greeting cards and possibly note card packs out of them.
2. Sell the entire box on Fairview Place.
3. Give them to my sister since she LOVES birds.

So far I haven't sold any of my greeting cards on Etsy, so I'm thinking I should wait to create any more at the moment. However, maybe I'll make some cards and send them to my sister, that way I'm two for three :) I guess you'll just have to wait and see what happens....!


DIY Silk Tube Scaves

The bottom one was my
grandmother's :)

I came across this great tutorial from Belrossa and knew I finally had something to make with the vintage scarves I've been holding onto! Cowl scarves! I put her directions to the test and am so happy with what I've made. I started with the two scarves above, ranging between 24" and 30" wide.


Next, you overlap the two ends and pin together. I used embroidery floss, instead of regular thread) to add a pop of that pretty purple color. Tie knots and the beginning and end, then cut the extra floss.

My grandma's scarf got a makeover!

This scarf came from a local thrift shop -
only 70 cents!

Tuesday, January 17, 2012

A Proper Printer


I cannot tell you how much of a difference a real printer makes. The one I had before I bought in college. Mike/we got a new printer for Christmas (thanks, Mom) and it has already made a world of difference - and I just hooked it up today!

I finally got around to designing my new promo cards. It was simple enough, but coordinating Facebook, with Twitter, an email account, Etsy, a blog and so isn't so simple. Now I can send out one simple little card be done with all the social media networking in one stab. And, with our new fancy printer, I can do everything from home!

Monday, January 16, 2012

Grandma's Slush


I've already touched on how my mom's sauerkraut balls are the symbol of the new year, but there is one symbol of Christmas I forgot to share with you...my Grandma's Slush. It's actually an amusing story. My grandparents never drank. Maybe one glass of that terribly sweet jug wine on Christmas day, but that's it. After my grandfather passed away, my grandma started making this slush and it's been a holiday tradition ever since. Since we stayed in Virginia this year for Christmas, I carried on the tradition and brought the drink to our Christmas Day get together with friends. The concoction was a huge success and will remain a holiday tradition for years to come!

What you need:
4 tea bags
2 cups sugar
12 oz frozen orange juice
12 oz frozen lemonade
2 1/2 cups whiskey
7up or Ginger Ale

What you do:
1. Boil two cups water and steep the tea bags for five minutes. Remove the tea bags and add the sugar. Stir until dissolved.
2. Mix in the orange juice, lemonade, whiskey and 4 1/2 cups of water.
3. Divide into two freezer safe containers and wait over night. The mixture won't completely freeze, so when it's reached the slushy consistency, add a little 7up and enjoy!

Side note on these lovely glasses: they're my
grandmothers and even with the slight chips
 in the rim I still love them to pieces -
plus they have a matching platter!!

Music Mondays

Photo courtesy of the Library of Congress

It's payday (this week)! What better inspiration for a playlist than that? And, what charming photo of  Iowa Homesteaders getting paid at a coal mining office ;) Happy Monday!

Friday, January 13, 2012

DIY Packaging


I had a lot of these little promo cards left over from my craft show last month and since I'm in the process of creating new (and 100 times improved) promo cards I found a way to use them in my packaging! It's a simple way to incorporate your business into the wrapping - and you could use a business card, a postcard, a notecard - just about anything.

Just take your promo material and punch two holes in either side. Feed some ribbon, lace or twine (in my case) through the wholes with the string in the back. Wrap around your package and tie in the front.

Now, I just need to sell a bunch of items to get rid of the rest of the tags :)


Thursday, January 12, 2012

DIY: Vintage Inspired Headbands

 HemsAndBusties,
EricaElizabethDesign,
BaroqueAndRoll

I've seen these 1920's inspired headpieces popping up everywhere! I saw a cute one at Hancocks the other day and it was $15, which is waaaaay more than I would ever spend on something like that. So I came home and did a little search on Etsy and apparently I was looking at a steal. While the ones above are beautiful and unique, I wouldn't be caught dead wearing a $160 headpiece (not even for my wedding!).

After my New Year's dress didn't work out I decided to just go in all black (surprise, surprise) but top off the outfit with one of these nifty headbands. It was SO simple and didn't cost me a penny. Even if you were starting from scratch, you could probably make this for less than $4).

What you need:
Felt, fabric, thin ribbon or wide lace (or both), feathers, pipe cleaners,
One plastic headband (the Dollar Tree sells them in packs of six for $1)
Glue
A button
A needle and thread

What you do:
1. Start, by cutting a 3" circle out of the felt, this will be your base. Then cut out some petals in the felt and fabric. My petals are about 2" long and 2" wide.


2. Lay the circle down, add glue and one of your feathers. Layer the fabric petals, add glue. Cut strands of the thin ribbon (anywhere from 4" to 10"). Place these sporadically on your flower and add glue.


3. Add the layer of felt petals and add glue.


4. Now, cut five 10" strands of the wide lace and make loops, with the ends in the center. Add some more glue, another feather and some shorter strands of the thin ribbon.
4. Almost done! Cut a small 1" circle out of the felt. Place your button on top, headband on the bottom and sew it all together.
5. Place in your fancy hairdo and hit the streets!