

We bought this buffet and hutch for $100 from one of Mike's Dad's contractors with the idea that we'd refinish it or sell it and make a few bucks. When Barney dropped the piece off it was in need of a little TLC, so we cleaned it up with some Old English the previous homeowners left us. Surprisingly, it looked really nice! However, it still didn't match our brand new table that looks almost identical to this one from World Market.
I listed the piece on Craigslist and it sat for about three weeks. Since our housewarming party was nearing and I didn't want this unmatching piece hogging the spotlight I got to work on researching techniques for "refinishing cherry wood to look like world market table." You can imagine how many search results I found: exactly Zero. After talking to a Home Depot employee (who didn't actually roll their eyes at this project), I decided I would have to make up my own technique. I bought black paint, black varnish and a pack of plastic gloves for $10.

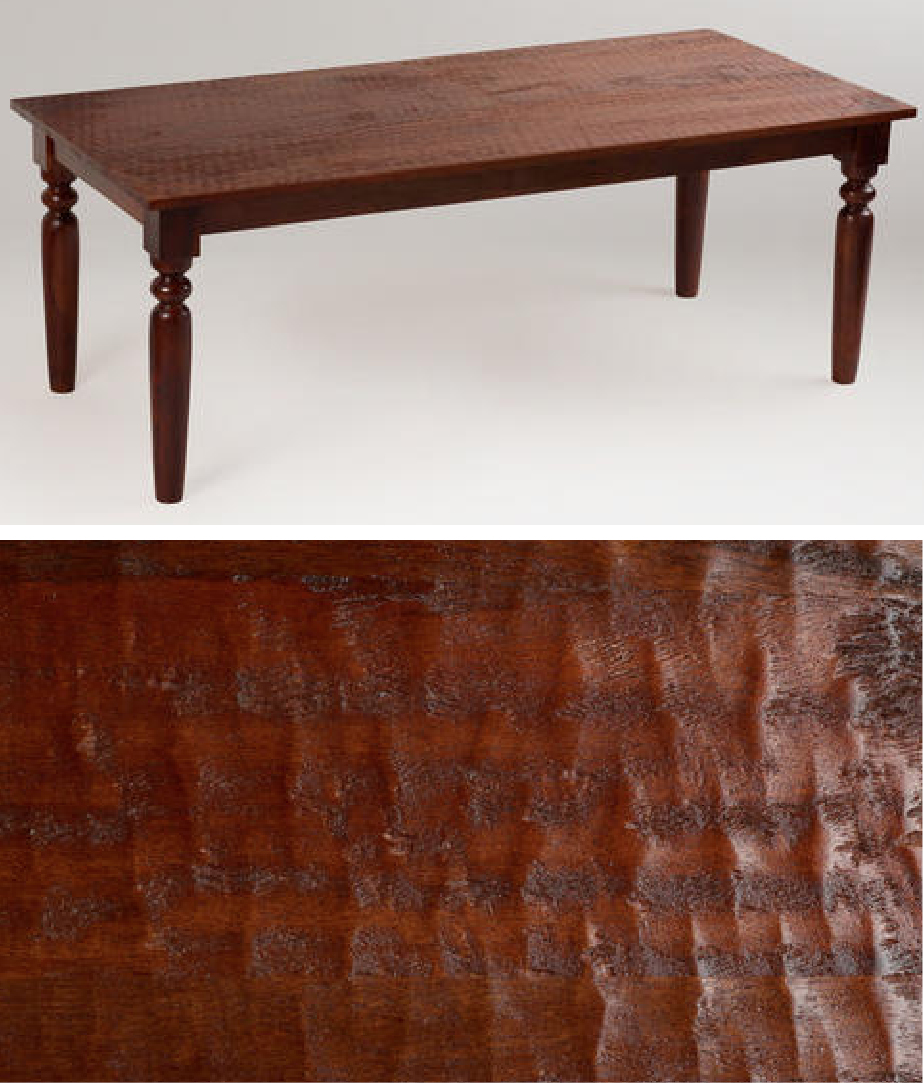
We removed all the hardware and wiped down the cabinets. Then Mike got to work "distressing" the wood by take a hammer to it. We decided that using all the different edges worked best to give it the super textured look. Next, I took the electric sander and went light over the entire surface and much harder in only a few areas for that weathered look. Using a damp cloth, wipe the surface completely clean.

Instead of a "white wash" that I'm sure you've heard of, I made a "black wash." It consisted of 1 part flat black paint to two parts water. I gave it a stir and painted it on. Oh, and this would be the point you need to put on your gloves.

Because you're going to take a rag and wipe all the paint off. You want to make sure the black wash has covered all the surfaces, but don't be too worried if it looks too dark at first. I left the wash on anywhere between 5 and 10 minutes. I tried to work fast, but with the bottom it was harder to get through all the sides quickly. Just make sure the paint doesn't dry before you can wipe it off.
 |
| Here is the hutch after hours of hammering it. I'm glad this was Mike's task! |

Once your black wash is completely dry, open up your can of black varnish. I cannot stress enough to make sure both hands are gloved! Take a dry rag and dip into the varnish, wipe on the wood with the grain. You're almost going to massage the varnish into the wood, I'll warn you, this is the tricky part. You don't want to use too much varnish because it'll be sticky as it dries and smudgie (trust me, I learned this the hard way). Just use a little as you go and be sure to wipe away any excess. We experimented with the drawers one day and let them dry over night, I tweaked the process from that - if you have the time, try it that way.


 |
| Grandma's mash potato dish, Great-Grandma's fondue dish, Haviland Wedding China passed down through generations, a house warming gift, a graduation gift, a Moroccan treasure and a gift from a strange. Everything has a story, everything has a place in my heart. |
Make sure you have these essentials!
Cotton rags or your boyfriend's old undershirts (lots of them)
Several pairs of rubber gloves
Electric hand sander
sandpaper
flat black paint
black varnish
a tarp or drop cloths
paint brushes
jar with lid (to mix the paint and keep overnight)

I am happy to use this as my "No. 27 Freebie." I'm participating in the 92 Days of Summer challenge. To learn more about it, click here.